
Building Gadgets 2 – Quick Guide#
Building Gadgets 2 is a building mod that allows you to place, replace, copy, move, or remove large areas and structures much faster.
Note: This guide is based on Building Gadgets 2 for current Minecraft versions (1.20+ / NeoForge). Depending on the modpack, keybinds, energy usage, or individual functions may differ.
Most Important Keys#
The default keybinds may already be used by other mods. You can check or change them under:
Options → Controls → Key Binds → Building Gadgets 2
| Key | Function |
|---|---|
| Hold G | Open the settings menu of the held gadget |
| U | Undo the last action |
| H | Toggle / lock the preview anchor |
| R | Change the range |
Building Gadget#
The Building Gadget is the main tool of the mod. It allows you to place many blocks at once.

Selecting a Block#
- Hold the Building Gadget.
- Shift + Right-click the block you want to use.
- The selected block is stored in the gadget.
- Aim at a surface.
- The green preview shows where the blocks will be placed.
- Right-click to place the blocks.
You need the required blocks in your inventory or in a connected inventory, as well as enough energy.
Important Building Modes#
Open the gadget menu with G to select a building mode.
| Mode | Function | Typical Use |
|---|---|---|
| Vertical Column | Builds a vertical column | Pillars and supports |
| Vertical Wall | Builds a vertical area | Walls |
| Horizontal Row | Builds a horizontal row | Edges and paths |
| Horizontal Wall | Builds a horizontal area | Floors and ceilings |
| Surface | Follows an existing surface | Large or uneven surfaces |
| Build to Me | Builds from the targeted block toward your position | Bridges and long rows |
| Grid | Places blocks at regular intervals | Lighting and patterns |
| Stairs | Creates a stair-shaped structure | Quick paths up or down |
Adjusting the Range#
Use R or the G menu to change the range.
The larger the range, the more blocks the gadget can process with a single action.
For large areas, it is a good idea to test with a smaller range first.
Anchor#
The Anchor lets you lock the current preview in place.
Default key:
H → Toggle Anchor
This is especially useful when you want to:
- inspect a large wall,
- align a Copy/Paste structure,
- walk around the preview,
- verify a large action before confirming it.
Exchanging Gadget#
The Exchanging Gadget replaces existing blocks with another block type.
Example:
Cobblestone → Stone Bricks
The original block is normally returned and the new block is placed instead.
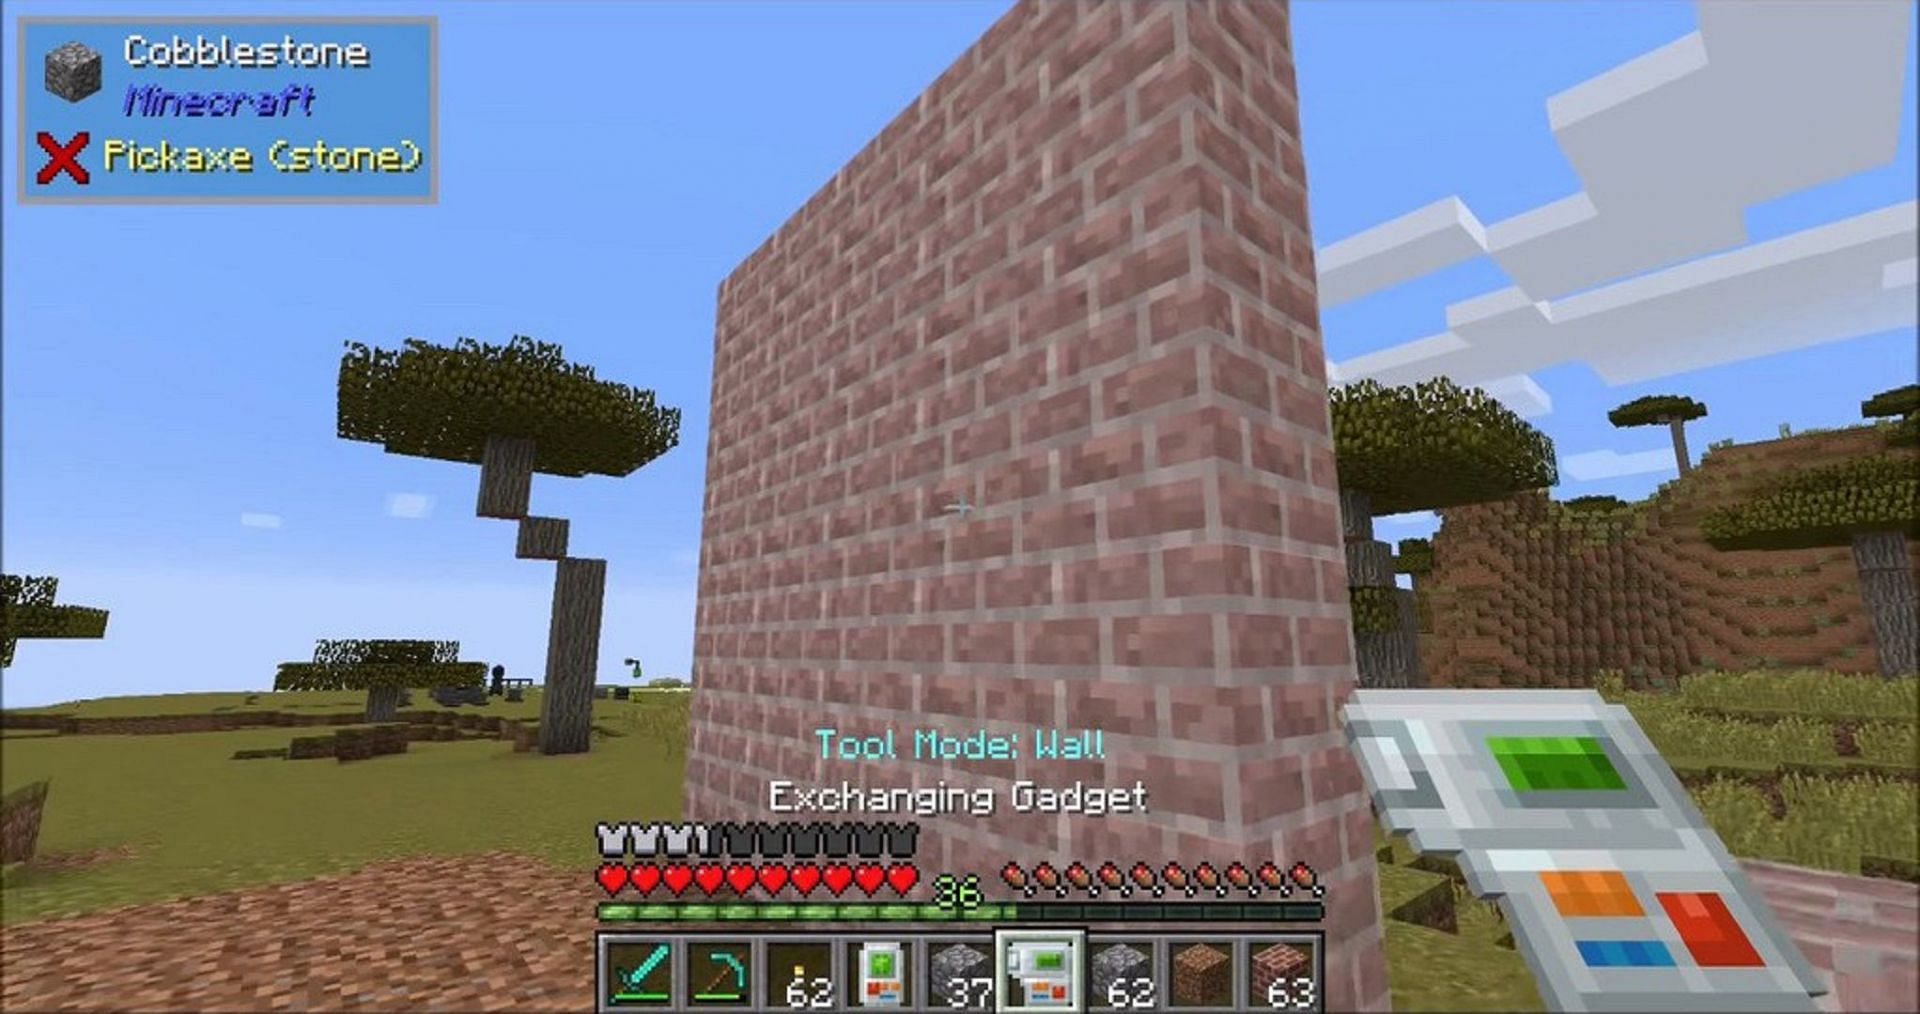
Usage#
- Hold the Exchanging Gadget.
- Select the new block you want to use.
- Use G to configure the shape and range.
- Aim at the area you want to replace.
- Check the preview.
- Right-click to replace the blocks.
Connected Area#
Connected Area limits the action to connected blocks of the same type.
This is particularly useful if you only want to replace one wall made of Stone Bricks even though there are other Stone Brick structures nearby.
Fuzzy Mode#
With Fuzzy enabled, the gadget is no longer limited to one specific block type.
It can replace different blocks within the selected area.
Copy Paste Gadget#
The Copy Paste Gadget can copy complete structures or selected areas and place them somewhere else.
Copying an Area#
- Set the gadget to Copy Mode.
- Right-click to select the first corner.
- Move to the diagonally opposite corner.
- Shift + Right-click to select the second corner.
- The selected area will be shown as a preview.
You can further expand or shrink the selection in all directions through the gadget menu.
Pasting a Structure#
- Switch the gadget to Paste Mode.
- Aim at the desired position.
- Check the preview.
- Adjust the position through the menu if necessary.
- Right-click to paste the structure.
You need the required building materials to place the structure.
Replace Blocks#
Normally, pasting mainly uses empty positions.
With Replace Blocks, the structure can also overwrite blocks that are already present.
Cut Paste Gadget#
The Cut Paste Gadget moves an entire structure.
Unlike the Copy Paste Gadget, it does not create a copy.
The selected area is removed, stored in the gadget, and then placed somewhere else.
Usage#
- Select the first corner.
- Select the diagonally opposite corner.
- Check the selection.
- Use Cut in the menu.
- Move to the new position.
- Switch to Paste.
- Align the preview.
- Place the structure.
Destruction Gadget#
The Destruction Gadget removes large amounts of blocks at once.
It is useful for:
- creating large rooms,
- digging tunnels,
- terraforming,
- removing large wall sections,
- clearing building areas.
Adjusting the Size#
The menu allows you to configure several directions:
- Depth – depth
- Left – extend to the left
- Right – extend to the right
- Up – extend upward
- Down – extend downward
The preview shows the complete area that will be removed.
Removing Fluids#
With Raytrace Fluids, water or lava sources can also be included.
This can be useful when clearing or draining large areas.
Undo#
Many gadget actions can be undone.
Default key:
U → Undo
This is especially useful if:
- a wall was built in the wrong direction,
- an area was too large,
- the wrong blocks were exchanged,
- the Destruction Gadget removed the wrong area.
Connecting an Inventory#
Building Gadgets 2 can use building materials from a connected inventory.
Depending on the modpack, compatible storage may include:
- Chests
- Barrels
- other compatible inventories
- in some cases, storage systems from other mods
Select Bind Inventory in the gadget menu and then connect the desired inventory.
This allows you to build with large quantities of materials without carrying everything in your player inventory.
Energy#
The gadgets require Forge Energy / FE.
If a gadget does not work even though you have the required materials, check the following:
- Is the gadget charged?
- Are enough materials available?
- Is the preview valid?
- Is there a keybind conflict?
- Is the area protected or claimed?
Template Manager#
The Template Manager can be used to save copied structures and share them with other players.
Typical workflow:
- Copy a structure with the Copy Paste Gadget.
- Place the Copy Paste Gadget into the Template Manager.
- Add paper.
- Save the structure as a template.
- Load the template back into a Copy Paste Gadget later.
Templates can also be exported as text codes and shared with other players.
This makes it possible to transfer complete buildings or individual building elements between players and worlds.
Quick Overview#
| You want to ... | Use |
|---|---|
| quickly build a wall | Building Gadget → Vertical Wall |
| build a floor | Building Gadget → Horizontal Wall |
| build a long row | Horizontal Row / Build to Me |
| build a pillar | Vertical Column |
| replace blocks | Exchanging Gadget |
| copy a building | Copy Paste Gadget |
| move a building | Cut Paste Gadget |
| remove a large area | Destruction Gadget |
| undo a wrong action | Undo (U) |
| lock a preview in place | Anchor (H) |
Tip for New Players#
For your first steps, these four things are usually enough:
- G opens the menu.
- Shift + Right-click is commonly used to select a block or selection point.
- Right-click performs the action.
- U can undo many actions.
If you also check the green preview before every action, most mistakes can be avoided.